First Local Notification
Let’s send our first notification to the LaMetric Time device. In order to do that you need to follow few simple steps:
Discover LaMetric Time device’s IP address
Discover API key
Do simple authenticated POST REST API call
Discover IP address
IP address can be found in LaMetric Time app at Settings -> Wi-Fi -> IP Address.
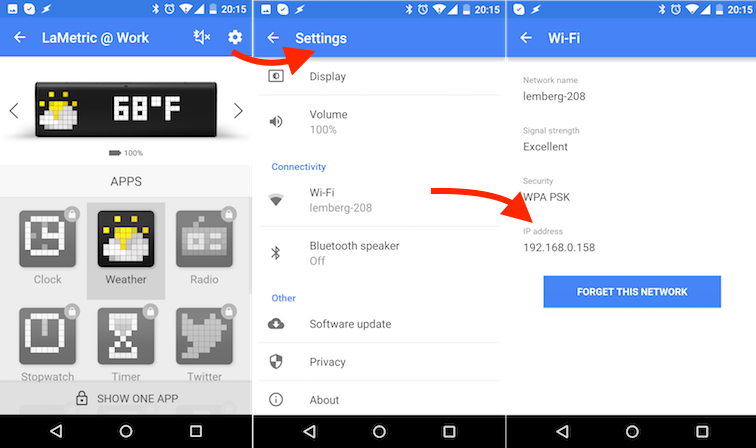
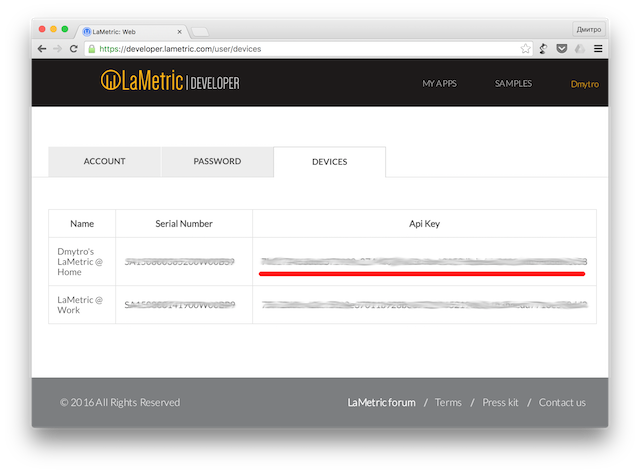
Find API key
API key can be found in devices section of your developer account.
Send notification
In order to send a notification you must do HTTP POST request to http://<lametric_time_ip_address>:8080/api/v2/device/notifications endpoint with headers:
Authorization: Basic <base64(dev:api_key)>
Content-Type: application/json
and body:
{
   "model": {
        "frames": [
            {
               "icon":2867,
               "text":"Hello!"
            }
        ]
    }
}
Note
Copy paste curl example into your terminal window and don’t forget to reaplace <your API key here> and <ip address> with valid values.
HTTP Example:
$ curl -X POST -u "dev:<your API key here>" -H "Content-Type: application/json" -d " { \"model\": { \"frames\": [ { \"icon\":\"a2867\", \"text\":\"Hello\!\"} ] } }" http://<ip address>:8080/api/v2/device/notifications
HTTPS Example:
$ curl -X POST -u "dev:<your API key here>" -H "Content-Type: application/json" -d " { \"model\": { \"frames\": [ { \"icon\":\"a2867\", \"text\":\"Hello\!\"} ] } }" https://<ip address>:4343/api/v2/device/notifications --insecure
Result:
200 OK
{ "success" : { "id" : "4" } }
What’s next?
Now when you have learned how to make simple notification, it is time to create more complex one. Check out Notification API reference for more details. If you are interested in displaying data on the device permanently (like counter or metric) - check out First Indicator App section.